Networking
Important
Out of the box, the VMX will emit a Wi-Fi with an SSID of VMX-1234 and requires a password. The password is password. Older versions of the VMX may ship with an SSID of WorldSkills-1234 with a password of password.
There are four main ways to communicate with the VMX.
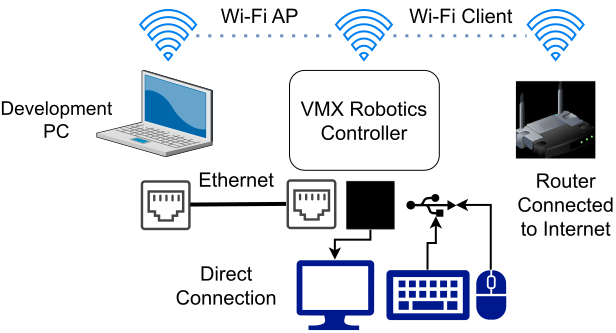
Wi-Fi Access Point (AP)
Wi-Fi Client (Access Internet)
Ethernet (Prefered)
Direct Desktop Connection
Tip
It is always recommended to be in Wi-Fi AP mode, and the preferred method of communicating with the VMX is Ethernet.
Wi-Fi Access Point (AP)
In Wi-Fi AP mode, the VMX will create its own Wi-Fi network that a user’s computer can connect directly to.

In Wi-Fi AP mode, the IP address of the VMX will be 10.XX.YY.2. XX.YY corresponds to a four-digit team number given by the user. Out of the box with the default image, the team number is set to 1234. With a team number of 1234, the IP address will be 10.12.34.2.
Changing the SSID Team number and password of the Wi-Fi AP is easily managed by a built-in script on the VMX.
setupWifiAP.sh SSID TEAMNUMBER PASSWORD
Where:
SSID is the prefix for the name of the Wi-Fi. Out of the box, this is
VMXaka the VMX in VMX-1234.TEAMNUMBER is the suffix for the name of the Wi-Fi. Out of the box, this is
1234aka the 1234 in VMX-1234.PASSWORD is an optional add-on that allows a password to be created for the Wi-Fi.
Out of the box on the default image for the VMX, the Wi-Fi is set up as VMX-1234 with a password of password. When using the setup script, it would look like this:
setupWifiAP.sh VMX 1234 password
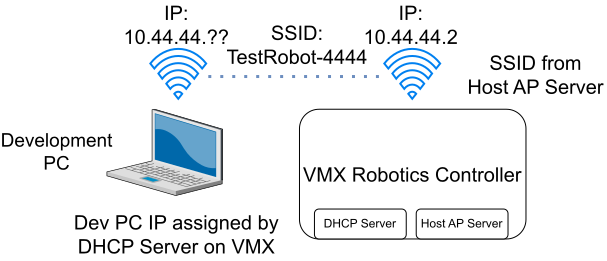
If the user wanted to change the Wi-Fi to be something such as TestRobot-4444 with a password of Checkers the user would run the command like this:
setupWifiAP.sh TestRobot 4444 Checkers
After running the command, the network will now look like this:
When switching from Client mode to AP mode, the SSID, team number and password do not have to be changed. Only the script needs to be run with no extra parameters.
setupWifiAP.sh
Ethernet
Ethernet mode is always active and hardcoded. This mode is recommended to be used at all times except when the robot completes a run.
The hardcoded IP address of the VMX ethernet port is always 172.22.11.2.

Wi-Fi Client
Wi-Fi Client mode turns the Wi-Fi AP off and will reconnect the VMX to any Wi-Fi-enabled router. This mode should be rarely used and only ever used for updating or downloading a new package for the VMX.

Run the following command in the terminal to put the VMX into Wi-Fi Client mode.
setupWifiClient.sh
Important
It is highly recommended to connect to the VMX via Ethernet, remote in, put the VMX into Client mode, do what needs to be done and then put the VMX back into AP mode using the commands from the AP section.
Remote Desktop Connection
It can be challenging to bring a monitor, keyboard and mouse around all the time. A remote desktop connection solves this problem by allowing the user to remote into the VMX to accomplish tasks. Remote desktop connections are available when connecting to the VMX via AP, Client or Ethernet. Built into the VMX’s default image is a VNC server. Using an application such as VNC Viewer, the user can remote in and see the desktop of the VMX. VNC Viewer can be downloaded here.
With the VMX connected via an AP, Client, or Ethernet method, open VNC Viewer on your computer. A window like this should open up:
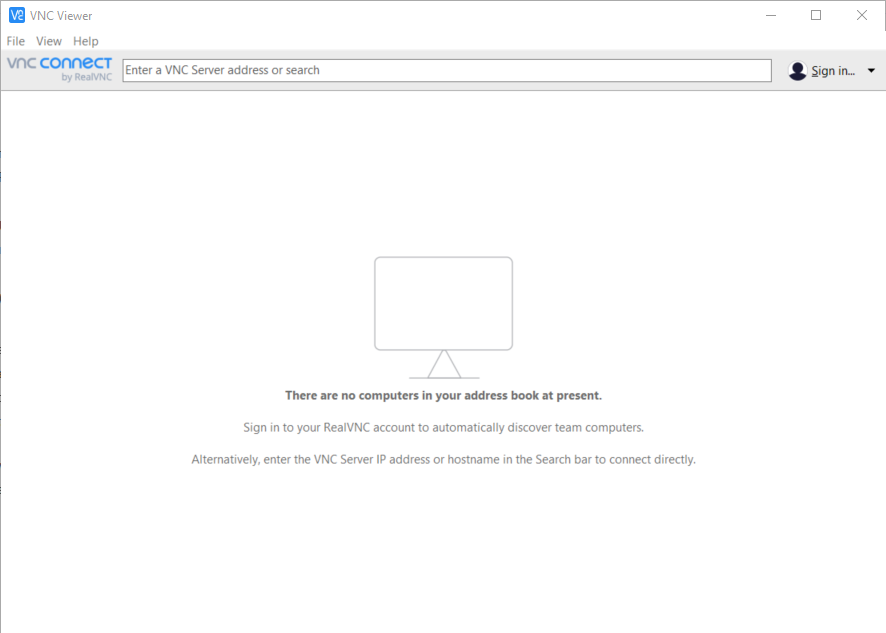
To create a connection to the VMX, the IP address of the VMX needs to be inserted. Remember from the AP and Ethernet sections that the IP address will be 10.XX.YY.2 (with XX.XX being your 4-digit team number) in AP mode or 172.22.11.2 when connected via Ethernet. If the VMX is in Client mode and not connected via Ethernet, the IP address must be obtained from the router admin portal of the Wi-Fi the VMX is connected to.

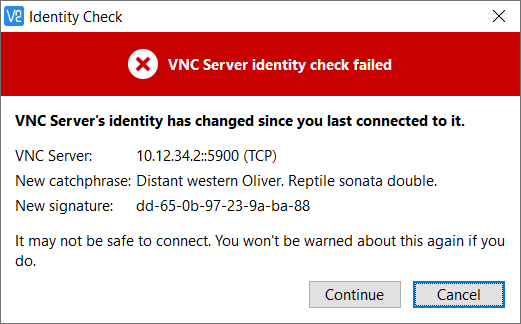
The first time you connect to the VMX from a computer, there will be an identity check error. Hit continue, and a login screen will open.
When the login screen opens, it will ask for a username and password. For the default out of the box VMX image, this will be:
Username:
piPassword:
raspberry
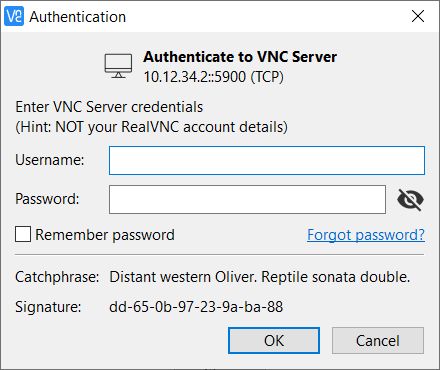
Once logged in, the desktop of the VMX should now be accessible.