Each download is required for correct installation.
WPILib
Click to download the 2020 version of WPILib for Windows 64-bit.
VS Code 1.41.1
Click to download the VS Code version required for 2020 WPILib.
Installation
Warning
Windows 7: You must install the standalone version of .NET Version 4.62+ which can be found here. Before preceding!
Note
The installation files are available to download above.
Locate and run the file named WPILibInstaller_Windows64-2020.3.2.exe.
Installing for All Users will require admin privileges and install for all users on the machine.
Note
Software will be installed to C:\Users\Public\wpilib\YYYY. YYYY Corresponds to the currently suppored year.
Installing VS Code
Due to licensing reasons with VS Code the installer does not contain it bundled in. To overcome this hit the Select/Download VS Code button.
This will open up the selector tool.
Select the Select Existing Download option and then select the file OfflineVsCodeFiles-1.41.1.zip. This will change back to the installer window and Execute Install can be run.
What was just Installed
Visual Studio Code - The preferred and supported IDE for robot code development.
C++ Compiler - Toolchains required for building C++ code.
Java JDK/JRE - Specific version of the JDK/JRE that is used to build code.
Gradle - Specific version of Gradle used for building and deploying Java or C++ code
WPILib Tools - Tools used for robot enhancement
WPILib Dependencies - OpenCV, etc.
VS Code Extensions - WPILib extensions for robot code development
Important
The installer creates a separate version of VS Code for robotics development, even if VS Code is already installed locally. This is done to prevent workflows from breaking.
macOS
Downloads
Each download is required for correct installation.
WPILib
Click to download the 2020 version of WPILib for macOS.
VS Code 1.41.1
Click to download the VS Code version required for 2020 WPILib.
Installation
Note
This section and all macOS examples was completed and tested using macOS High Sierra
The macOS installation requires multiple individual steps to be completed.
VS Code Install
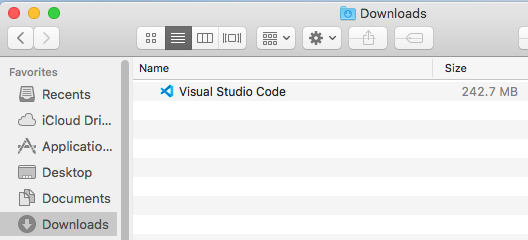
VS Code needs to be installed before the extensions are installed. The preferred version of VS Code is 1.41.1 which can be found in the downloads above. The file is called VSCode-darwin-stable.zip. Double click on the zip folder if it’s not extracted already and drag the VisualStudioCode into the Applications folder.
After dragging to the Applications folder the VS Code Icon will be visible in Applications
WPILib Install
The WPILib file WPILib_Mac-2020.3.2.tar.gz can be found in the downloads above.
Double click on the WPILib_Mac-2020.3.2.tar.gz to remove the .gz extension. Double click again on the WPILib_Mac-2020.3.2.tar to remove the .tar extension. Drag the WPILib_Mac-2020.3.2 folder into Downloads.
Open the terminal and run these commands
mkdirwpilib/2020
cp-R~/Downloads/WPILib_Mac-2020.3.2/~/wpilib/2020
This will create the appropriate directories for WPILib and move the contents of WPILib_Mac-2020.3.2 to the ~/wpilib/2020 folder. When done the folder structure should look like this.
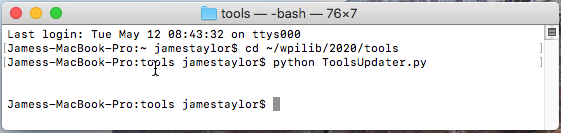
The tools need to be updated so they can be used. Run the commands below to do so.
cd~/wpilib/2020/tools
pythonToolsUpdater.py
An example of using the terminal is shown below.
Installing Extensions
For VS Code to work properly the WPILib extensions need to be installed. Open VS Code and use the shortcut Cmd-Shift-P to open the command pallet. Type in the command Extensions:InstallfromVSIX.
Navigate to the ~/wpilib/2020/vsCodeExtensions folder, select Cpp.vsix and hit install.
Repeat this step for all the vsix files located in ~/wpilib/2020/vsCodeExtensions.
They must be completed in this order:
Cpp.vsix
JavaLang.vsix
JavaDeps.vsix
JavaDebug.vsix
WPILib.vsix
Note
On the bottom right of the VS Code window popups will show saying if the installation is complete. Wait until there is a completed popup before preceding with the next extension. Also when installing the JavaLang.vsix there may be an error shown. This should be ignored for now
Getting VS Code to use Java 11
VS Code needs to be pointed to where the WPILib Java Home is. This is simply done by running the following command WPILib:SetVSCodeJavaHometoFRCHome.
What was just Installed
Visual Studio Code - The preferred and supported IDE for robot code development.
C++ Compiler - Toolchains required for building C++ code.
Java JDK/JRE - Specific version of the JDK/JRE that is used to build code.
Gradle - Specific version of Gradle used for building and deploying Java or C++ code
WPILib Tools - Tools used for robot enhancement
WPILib Dependencies - OpenCV, etc.
VS Code Extensions - WPILib extensions for robot code development
Linux
Downloads
Each download is required for correct installation.
WPILib
Click to download the 2020 version of WPILib for Linux.
VS Code 1.41.1
Click to download the VS Code version required for 2020 WPILib.
Vulkan
Click to download the Vulkan version required for 2020 WPILib.
Installation
Note
This section and all Linux examples was completed and tested using Ubuntu Desktop 20.04 LTS
The Linux installation requires multiple individual steps to be completed.
Installing VS Code
VS Code needs to be installed before the extensions are installed. The preferred version of VS Code is 1.41.1 which can be found in the downloads above.
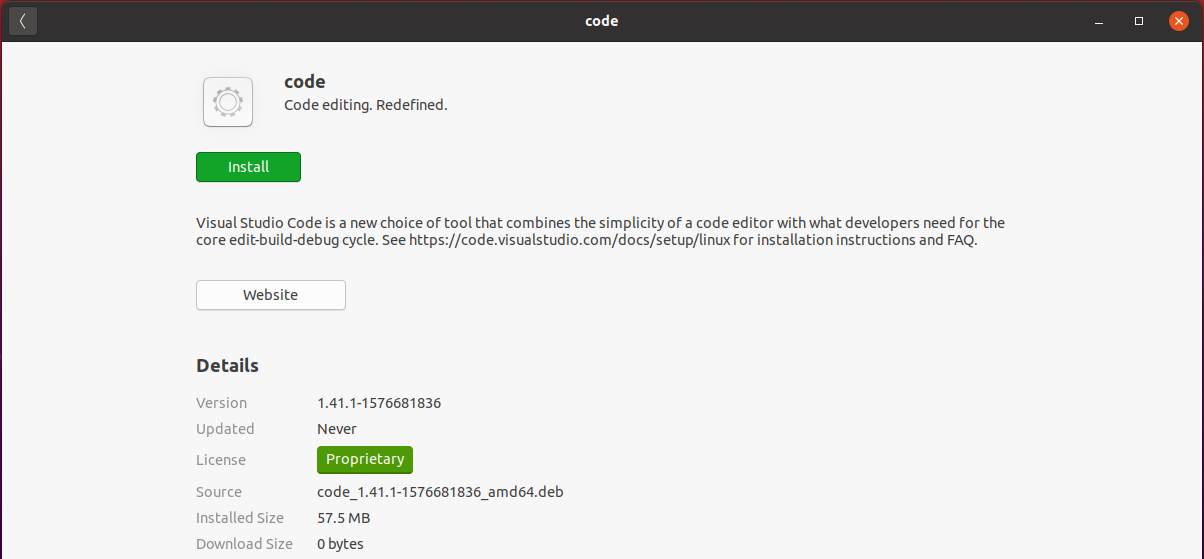
Using the file code_1.41.1-1576681836_amd64.deb, right click on the file and select OpenWithOtherApplication and chose SoftwareInstall. When software install opens verify the Version number as 1.41.1 and hit Install.
There should be an Authentication prompt asking for the user to input their password. After the Authentication window the install will start and should only take a minute.
WPILib Installation
The WPILib file WPILib_Linux-2020.3.2.tar.gz can be found in the downloads above. Place the file in the Downloads folder. Right click on the WPILib_Linux-2020.3.2.tar.gz and select ExtractHere. This will extract the contents and they can be moved.
This will move everything to the correct location and run the updater for the tools.
VS Code Extensions
For VS Code to be used for robotics the extensions from WPILib need to be installed.
Open VS Code using terminal by typing in code.
To open the command palette use Ctrl+Shift+P or hit F1.
In the command palette run the command Extensions:InstallFromVSIX.
Extensions can be found in ~/wpilib/2020/vsCodeExtensions
Install the Extensions in this Order
Cpp.vsix
JavaLang.vsix
JavaDeps.vsix
JavaDebug.vsix
WPILib.vsix
Note
After installing an extension it’s recommended to close and reopen VS Code.
Getting VS Code to use Java 11
VS Code needs to be pointed to where the WPILib Java Home is. This is simply done by running the following command WPILib:SetVSCodeJavaHometoFRCHome.
Vulkan Installation
For the simulation GUI to run, Vulkan is required. To install Vulkan there is a libvulkan1_1.2.131.2-1_amd64.deb file located in the downloads above. Right click on the file and select OpenWithOtherApplication and chose SoftwareInstall. This will then bring up the software install screen where you will hit Install, and the driver will then proceed to install.
What was just Installed
Visual Studio Code - The preferred and supported IDE for robot code development.
C++ Compiler - Toolchains required for building C++ code.
Java JDK/JRE - Specific version of the JDK/JRE that is used to build code.
Gradle - Specific version of Gradle used for building and deploying Java or C++ code
WPILib Tools - Tools used for robot enhancement
WPILib Dependencies - OpenCV, etc.
VS Code Extensions - WPILib extensions for robot code development